Time for an Upgrade
What is it like to have essentially no power as a nomad? For this client, she could tell you all about it. She had an Ecoflow power station that completely failed her. She didn’t have an immediate solution for several months, and as a result, she got used to a life with electricity as good as #dirtlife. That was, until we came around. After getting in contact, we quickly came up with a plan to turn her life around with a premium electrical system without breaking the wallet.
Oh, and this client wanted to learn along the way. We included DIY coaching into this project for hands-on experience and knowledge for maintaining and upgrading things in the future.
Where It All Started
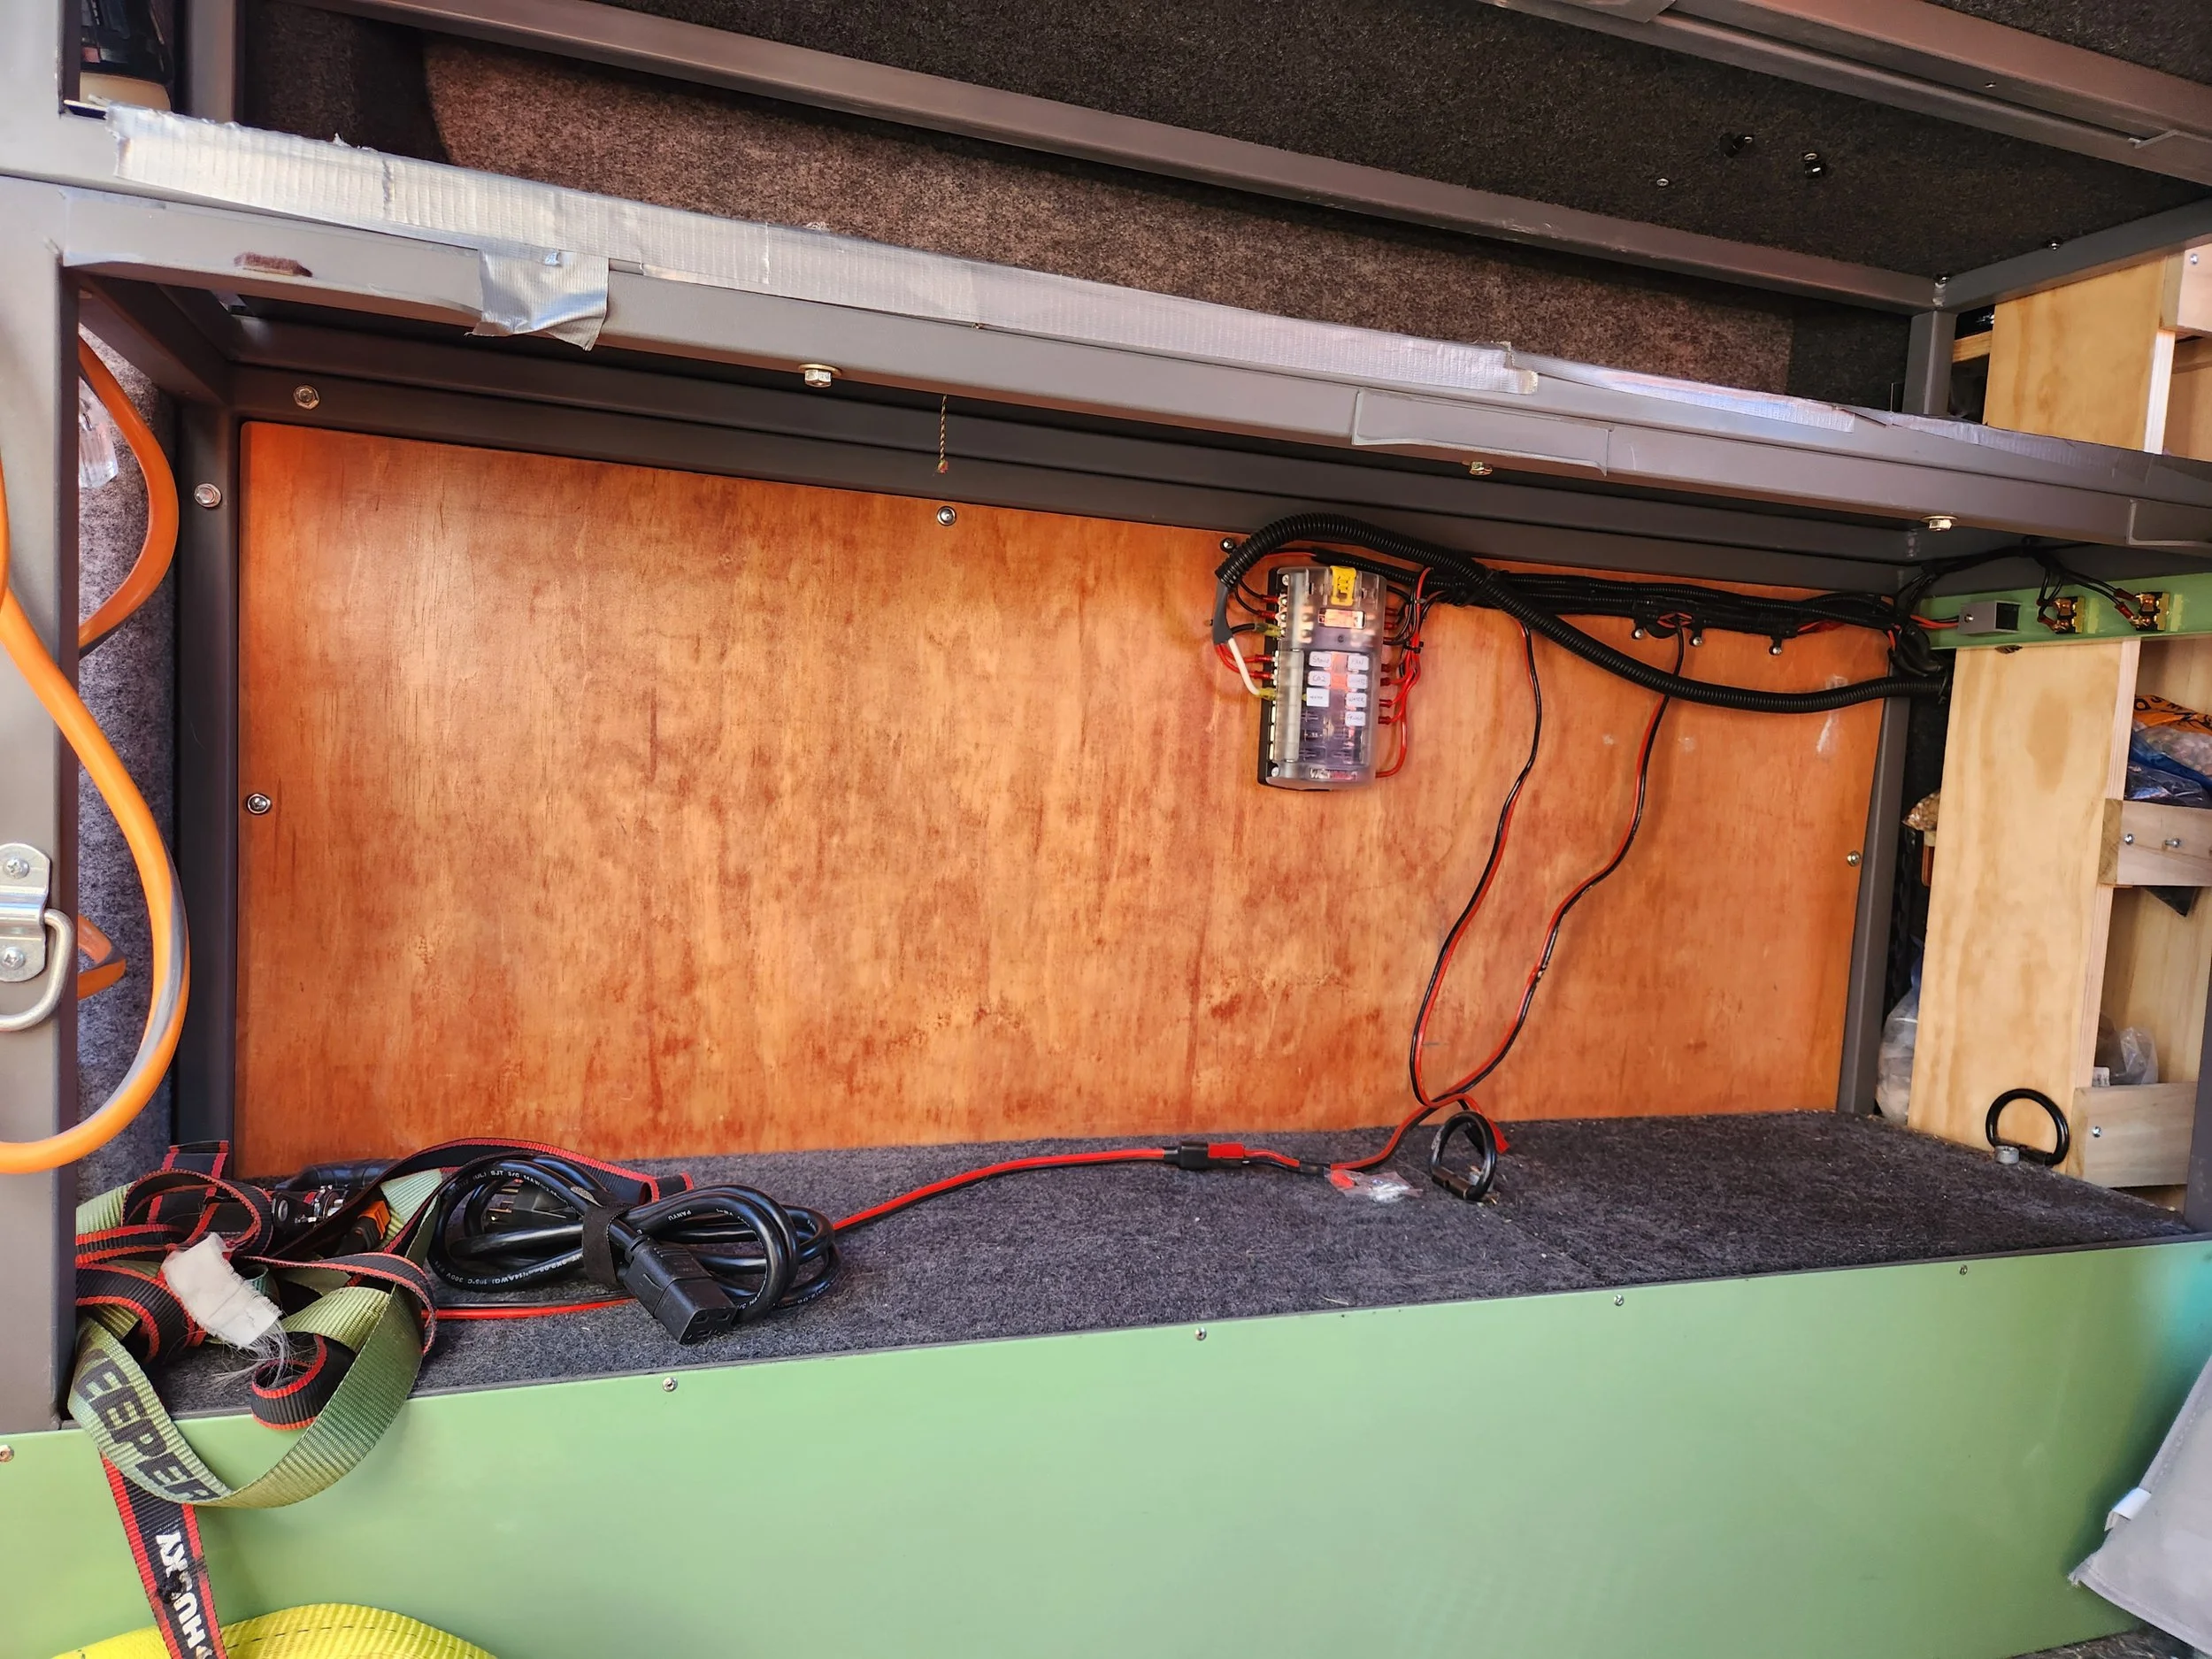
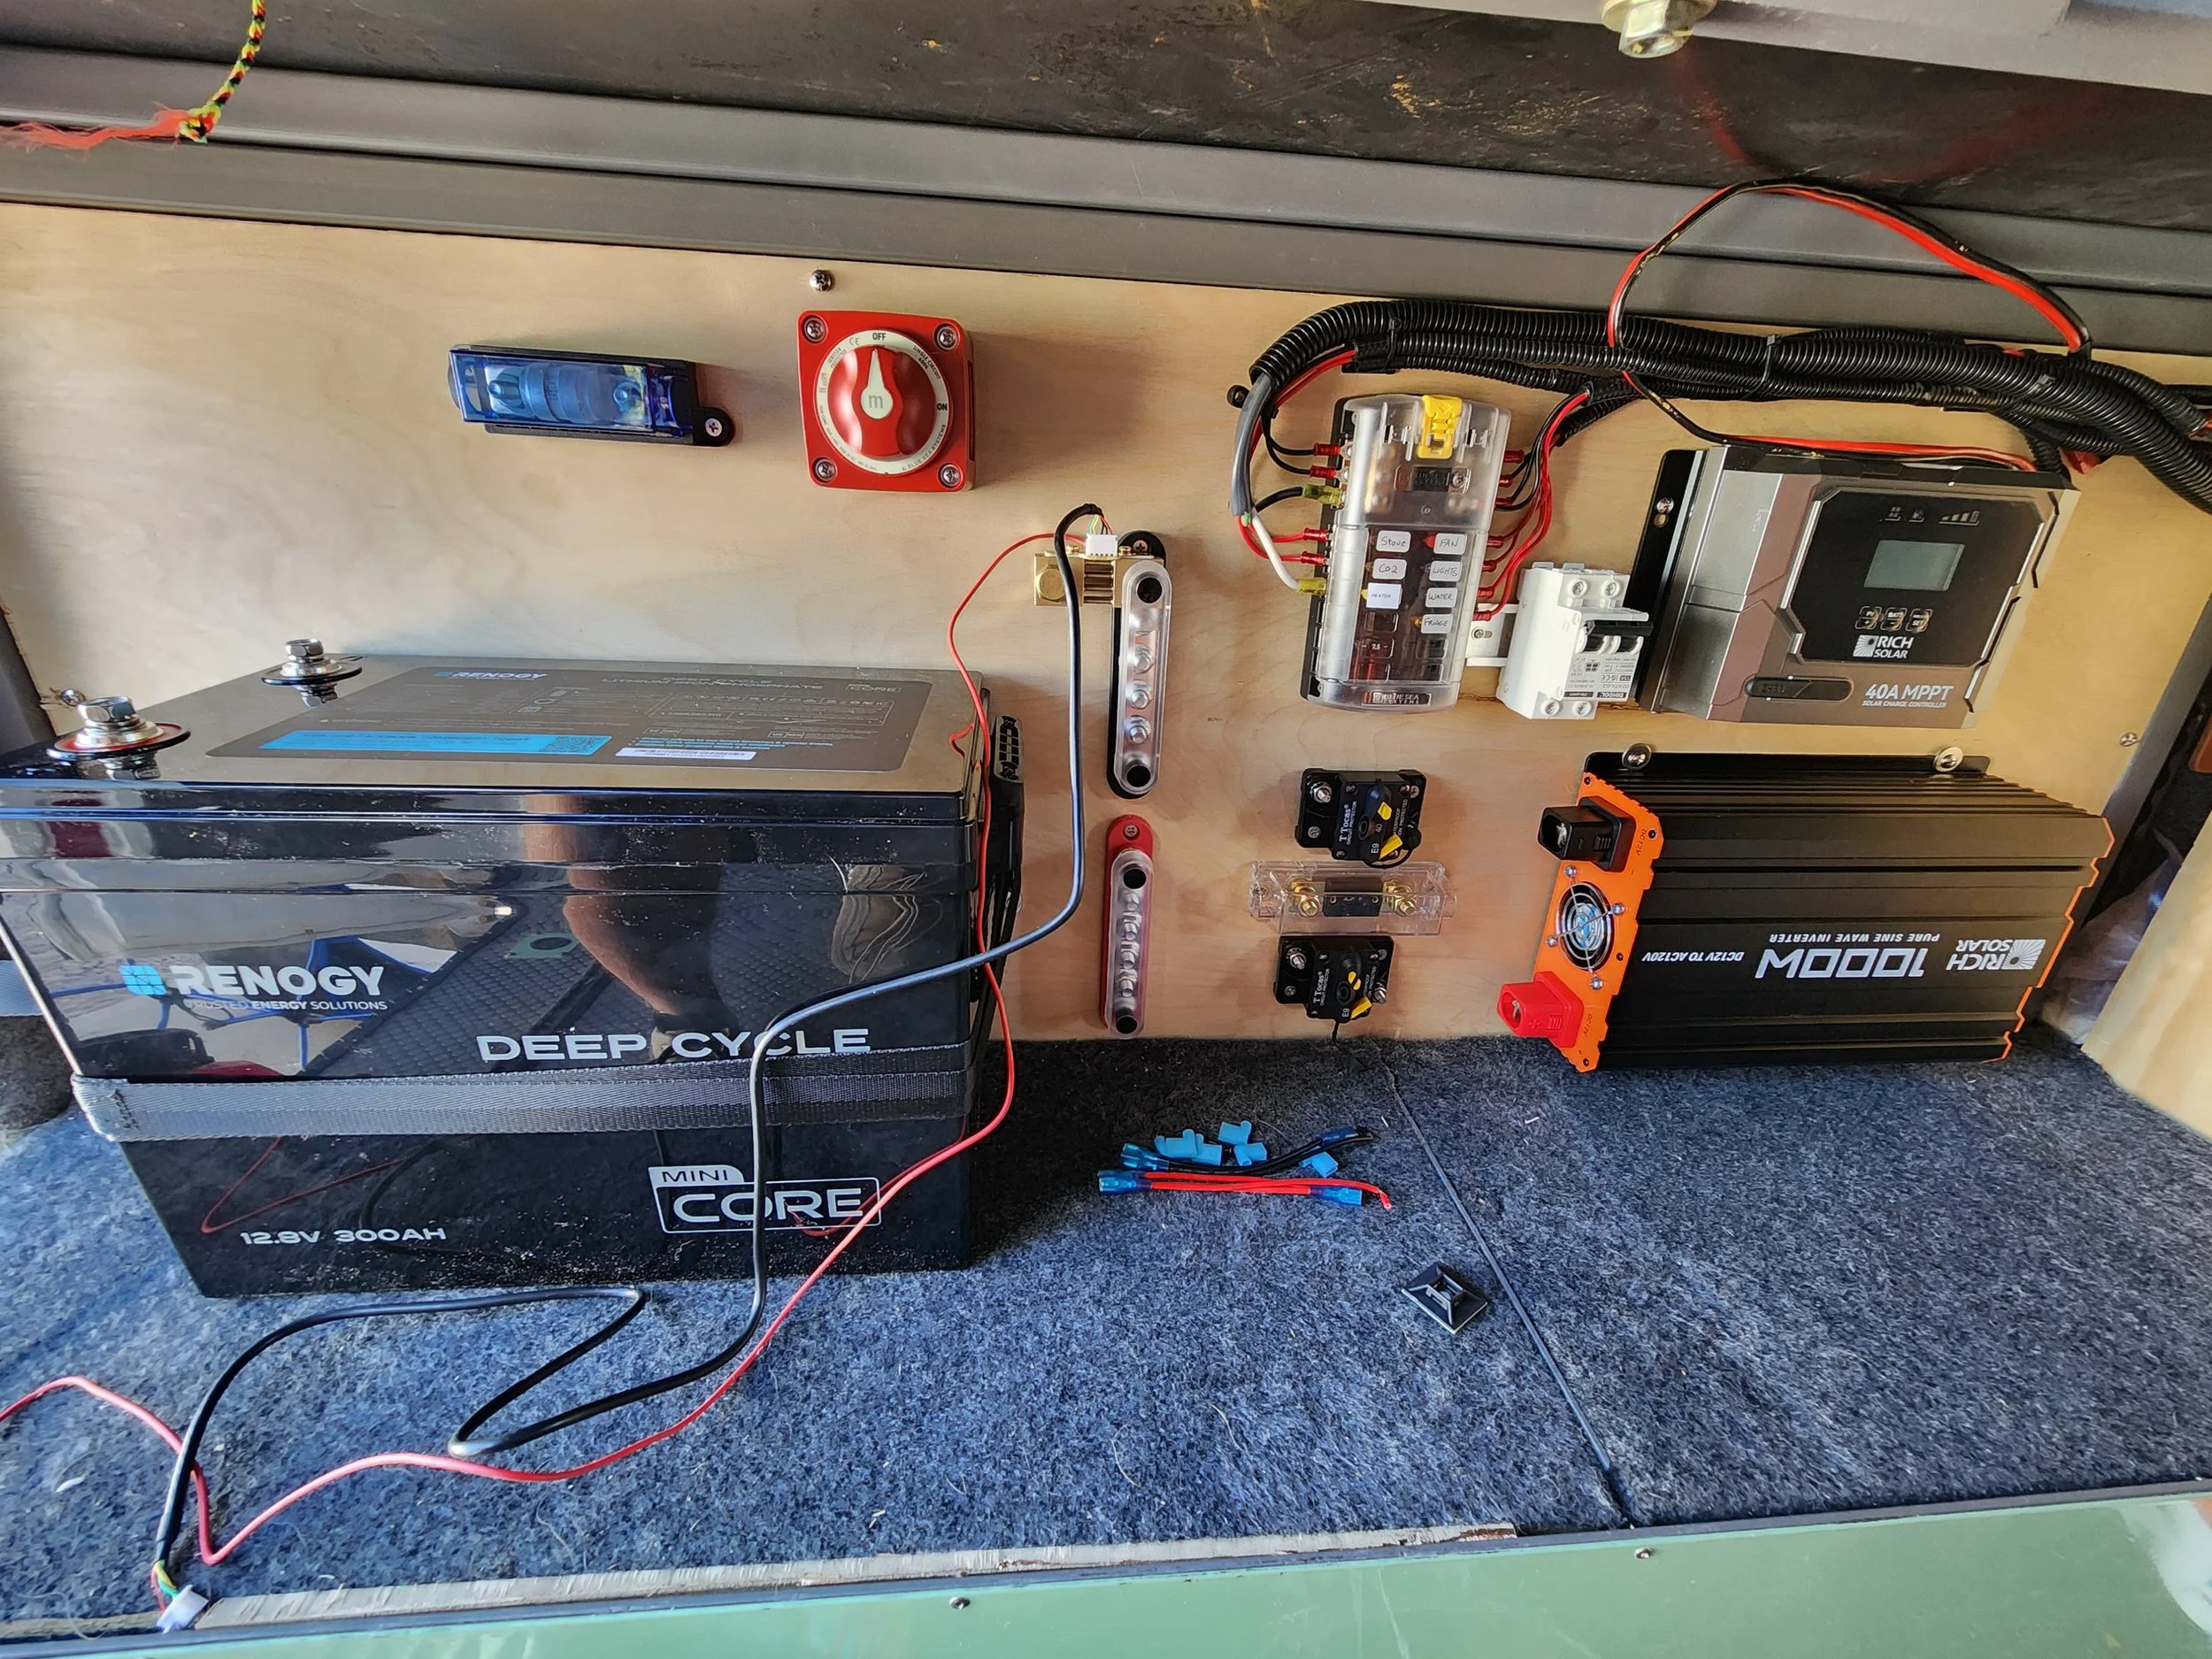
This project started mostly as a blank slate. All that existed was a fuse block with some wiring, and two 100W solar panels slapped directly on the roof. An ecoflow power station used to sit next to the fuse block, but it just wasn’t working right and needed to go.
Every project starts with the client’s energy needs, so we sat down (virtually) and discussed her needs and energy demand. From this, we calculated exactly what she needed for surviving a winter up in the PNW in the future. She was a bit of a minimalist and ‘hated appliances’. But the truth is, everyone eventually increases their electrical demands over time. One milk frother purchased later and my point was proven.
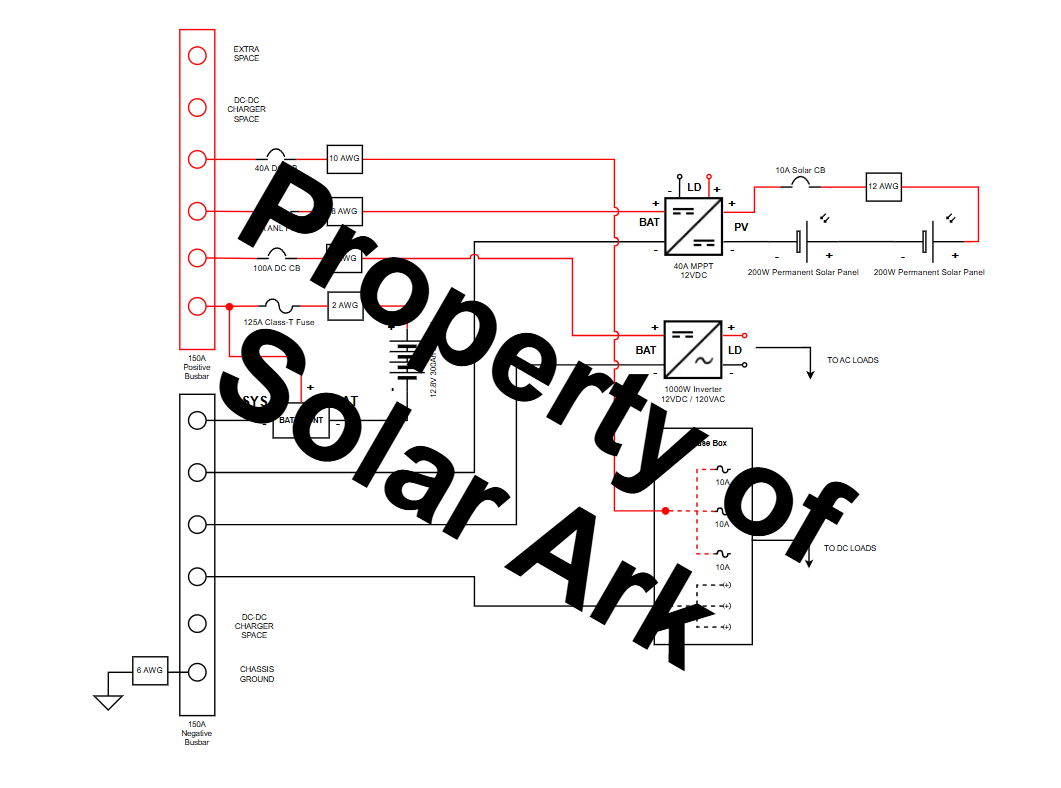
For all these reasons, we oversized her solar a bit to 400W, along with a 1000W inverter, 300Ah battery bank for 3 days of backup power, and a 40A MPPT to bridge the gap with the best performance possible. This would give room for growth, optimal performance in extreme snowy conditions, and peace of mind knowing this power system wasn’t going to fail her like the power station did.
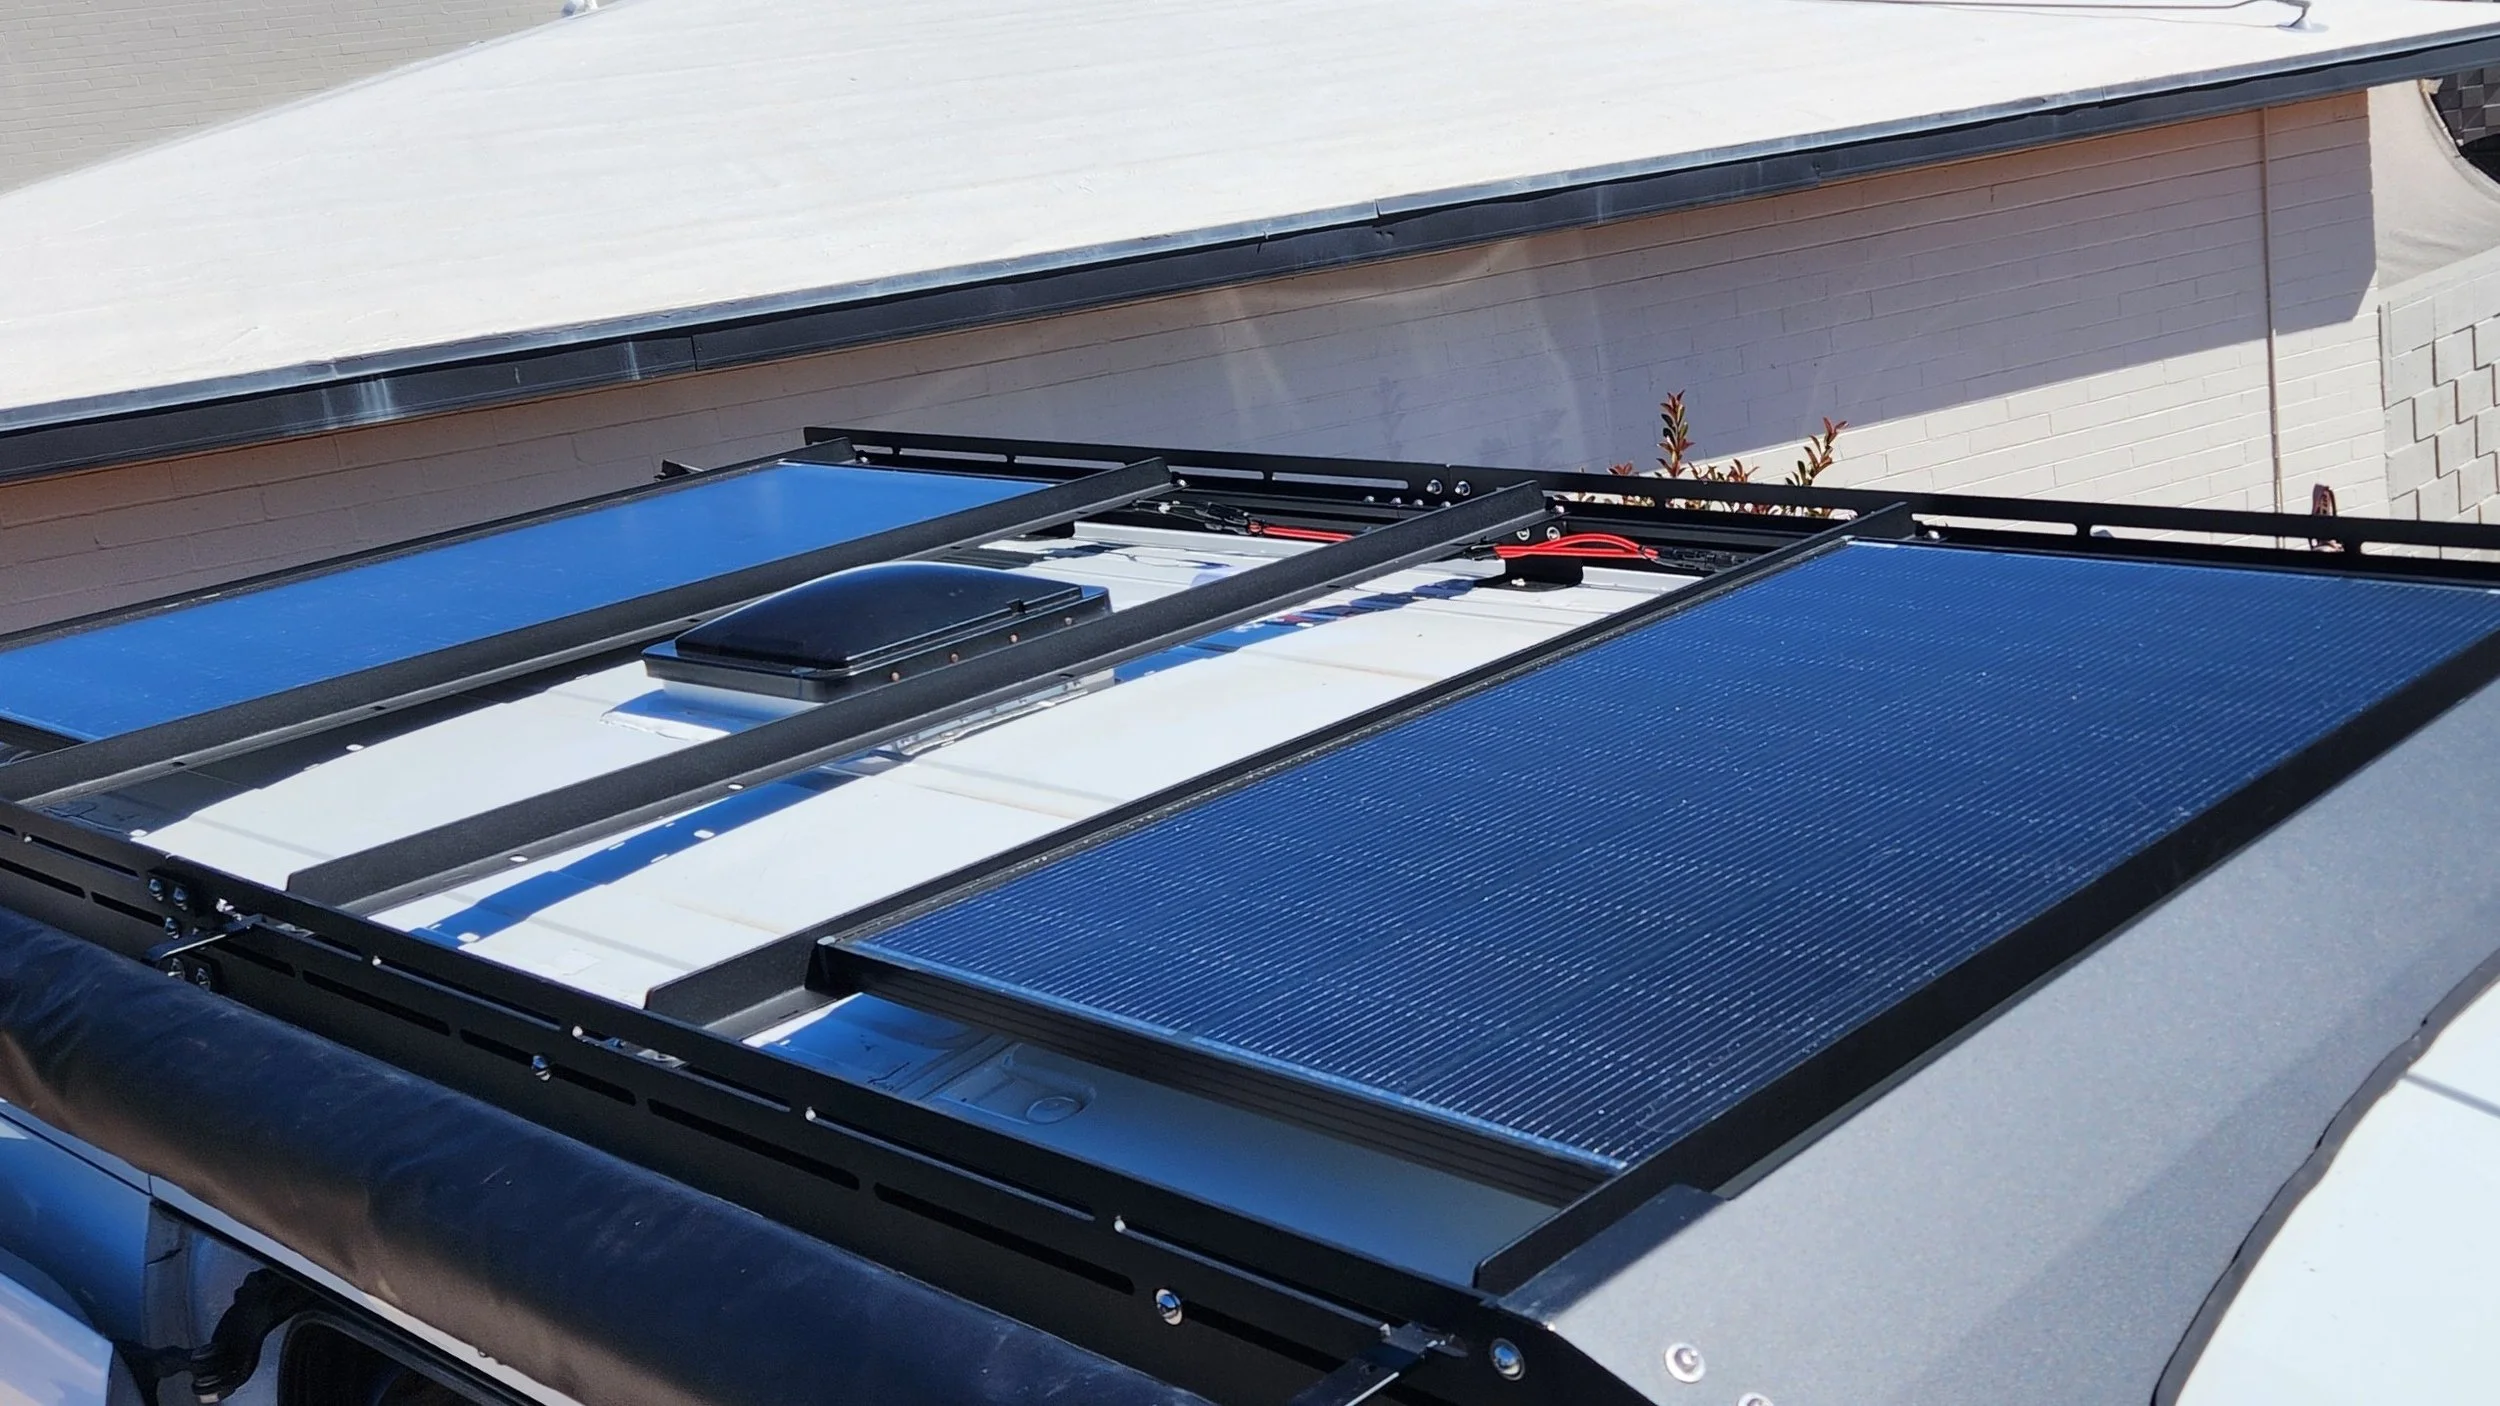
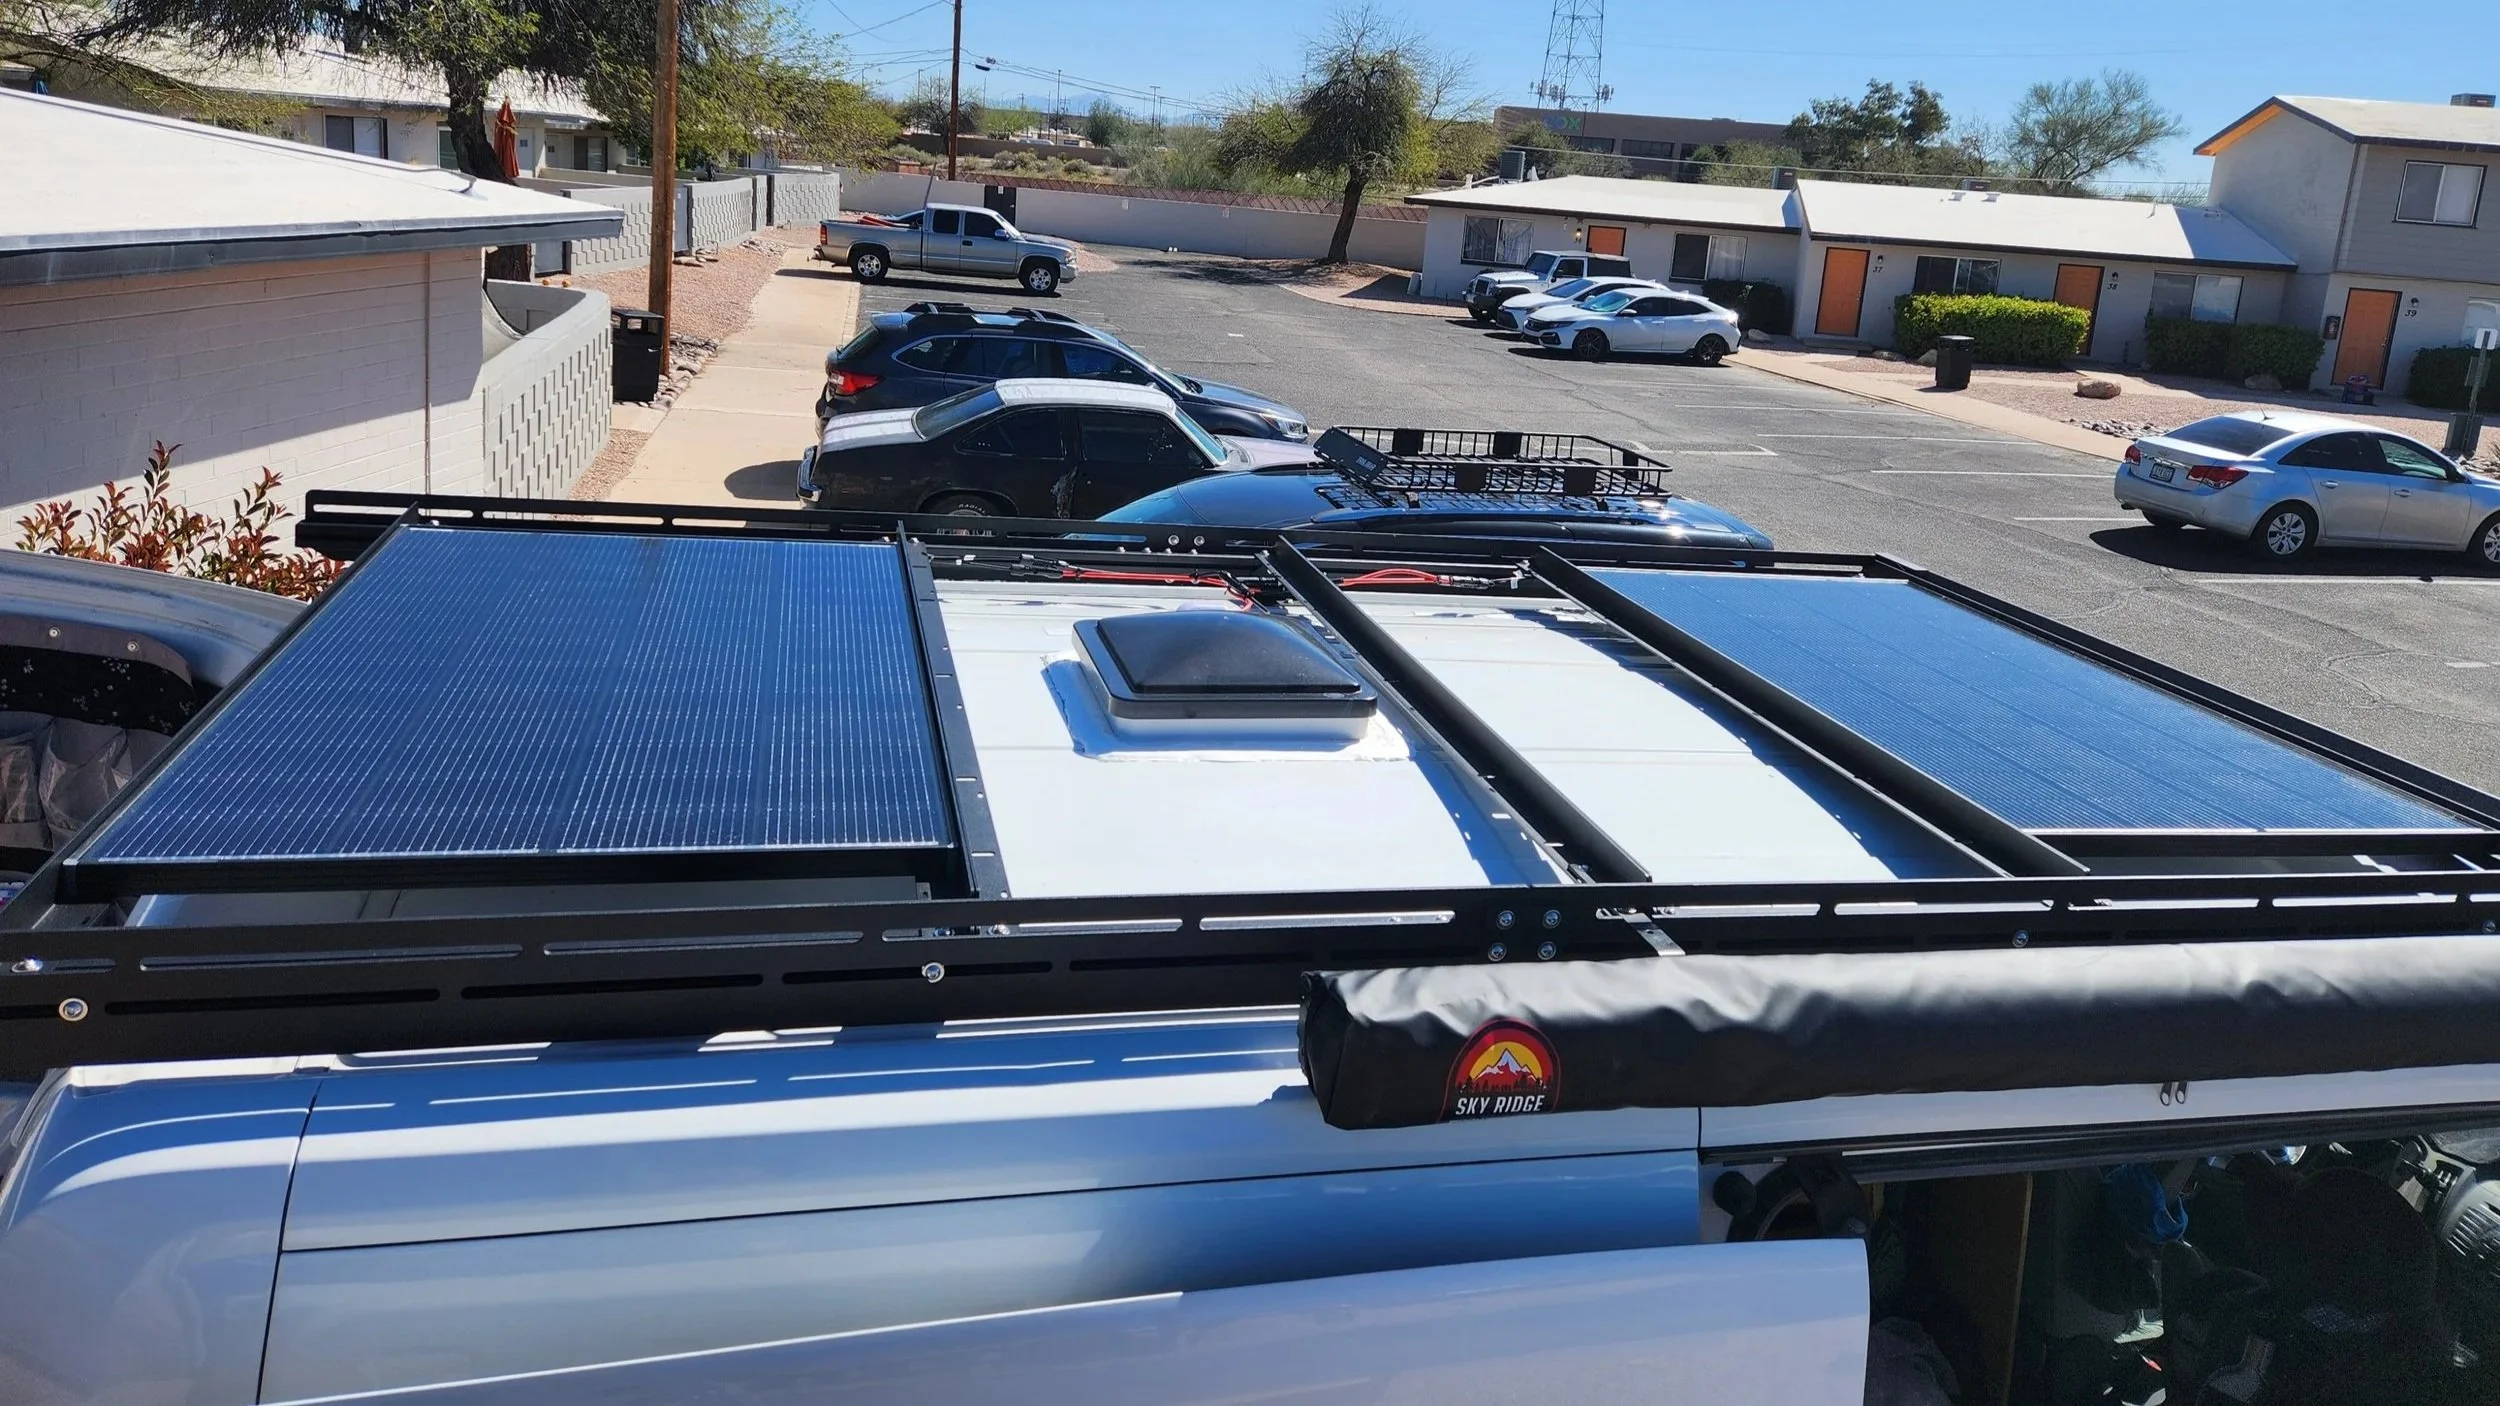
We planned on adding a roof rack for better modularity and maximum roof space. She’d use the extra space for storage, and it even gave us the opportunity to add an awning for little extra cost. Her van was a bit of a weird size, so a perfect fit didn’t exist. But we were able to find one that didn’t break the wallet, and we later got it fitting well without needing to trim it down like we initially thought.
DIY Coaching - Nobody Else Does It!
This client was very eager to learn all about electricity. So when she heard that we offered DIY coaching throughout the process, she was 100% on board. It started after the design, diving deep into the provided design report to understand the how and why to every design decision.
How do you figure out how much solar and battery power is needed? Walking through the differences between power (W) and energy (Wh) is a fundamental step to understanding the rest of the design. That includes calculating how much energy a solar panel can produce, how many days a battery will last under extreme conditions, and some performance estimates to reassure us that we’ll be smooth sailing. We answered all these questions at her pace, because each individual has their own learning style.
When installation time came, there was a balance in whether she should be involved. Clients will inevitably slow down work, and longer jobs means higher project cost. To save some time and redundancy, all parts were mounted on the new plywood background ahead of time. Mounting was planned out to make wiring a breeze, so she could put all her brain power in transforming the wiring diagram into a real power system.
When Reality Finally Strikes
When letting a client get involved hands-on, it’s very important to make sure everything is installed with safety and quality in mind. We started with her watching me hook up the battery wires, since these would always be live wires. Everything beyond this would be inactive, so a misplaced wire wouldn’t cause sparks to fly.
With an expert providing live guidance, wiring really isn’t so bad. We both worked alongside each other until the whole system was hooked up. After turning the switches and breakers on, her face lit up as she realized she just wired up her own electrical system.
Beyond the interior wiring, I still needed to get things done on the roof. Installing solar panels is more mechanically-oriented, so she wasn’t as involved with this part. First, I demoed the existing panels and brackets, sealing all holes with Eternabond tape to prevent water damage. Then it was off to installing a brand new roof rack, the solar panels, and finally an awning to turn this van into a nomad dream machine.
When all was said and done, she had a fully-functional electrical system made essentially from-scratch. She was armed with electrical knowledge in case she needed to make a repair or upgrade later down the road. She had a slick roof rack and awning on top, with solar panels that would look just as stealthy as any other van. And with a battery monitor, inverter remote control, and 65W USB ports to charge her laptop, This client was ready to take full control of her electricity once again.